Assigning Products to Admins
Assigning an Admin or Admins to a specific product is incredibly useful for organizing and tracking information. It allows you to assign the responsibility of a session (class, camp, event, trip) to a specific Admin in your project. You can assign Super Admins, Financial Admins, Collaborators, and Guests to specific products and keep track of how many sessions each is attached to in Admin Management.
In order to assign Admins or set instructors, navigate to the Products Management section by going to Settings -> Products.

Hover over the desired product you’d like to assign to a specific Admin and click Edit.

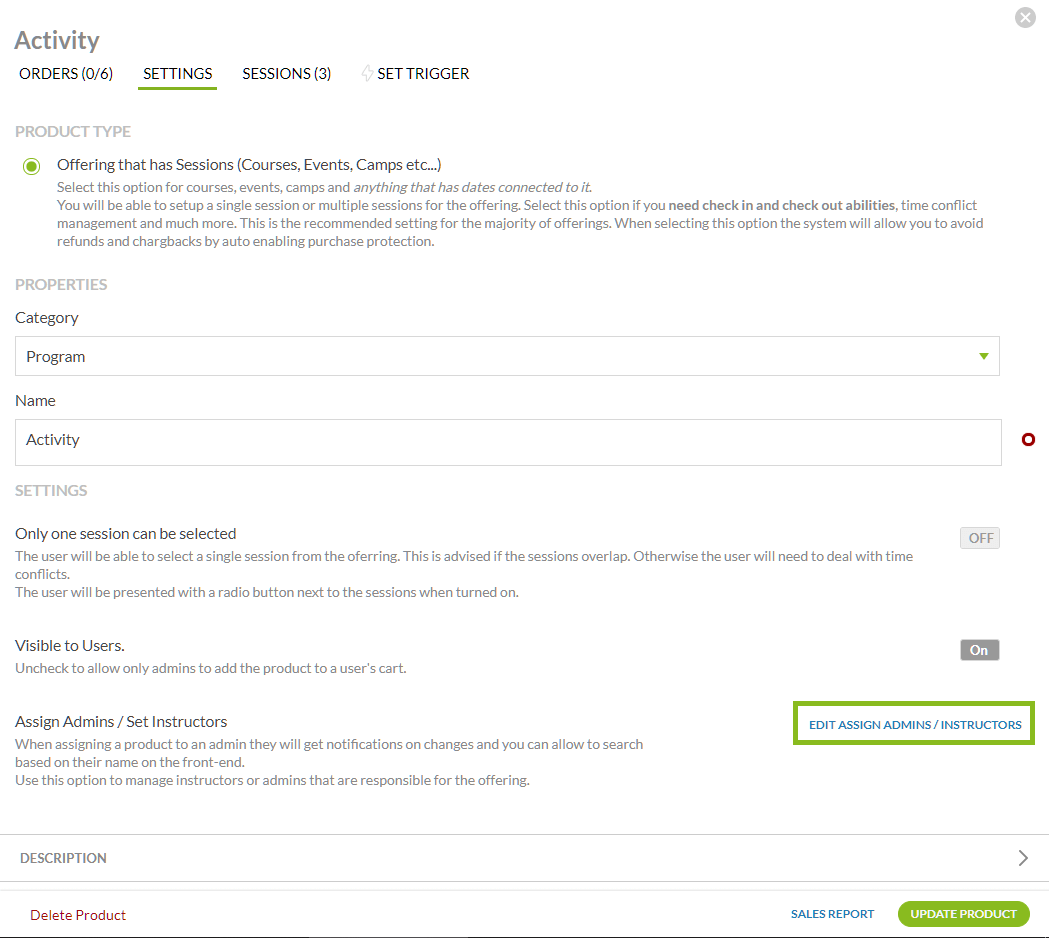
A separate menu will appear. Under the Settings tab, click the “Edit Assign Admins / Instructors” in order to assign or unassign Admins.

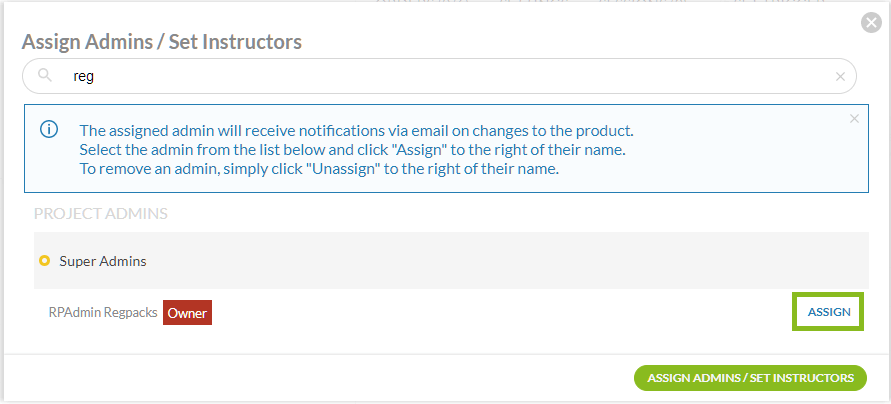
A sub-menu window will appear with the list of Admins who have access to this specific project in your organization.
If you do not see the Admin you wish to assign to this product, then they do not currently have access to this project. You’ll need to allow your admin permission to access this specific project in Admin Management.
In the sub-menu window search for the Admin, you wish to assign, then click Assign. Save your selection in the bottom right by clicking “Assign Admins / Set Instructors”.

Back in the Settings tab of the selected product, you’ll see the listed Admin(s), who is now assigned to this product.
Remember to click Update Product to save your changes.

On the Product Management page, you will see an icon of the assigned Admin(s) for that product represented with their initials.
If there is more than one, then a “+number” will appear, showing how many additional admins are assigned to that particular product.